Your compliance team has spent weeks producing a polished training video. The launch email goes out, calendars fill up, and the course sits unfinished between meetings. Even learners who reach the end may struggle to recall the reporting steps when they need them.
The problem usually isn't production quality. It's lesson structure and pacing. A long video asks working adults to sustain attention through content that may not match their immediate task, device, or level of prior knowledge. Microlearning addresses that problem, but only when the design does more than shrink a traditional course.
A useful microlearning lesson gives the learner one job, presents information in a deliberate order, creates opportunities to respond, and connects each lesson to the next. By the end of this guide, you'll be able to write a measurable objective, choose an ordering pattern, size segments according to cognitive load, pace activity within and between lessons, and adapt two practical templates for your own library.
Table of Contents
- Shorter video isn't automatically microlearning - Start with the learner's situation - Build the objective in three passes - Let the objective remove content - Problem-first - Workflow-first - Concept-first - Estimate the work inside the segment - Use a production heuristic - Template A for day-one onboarding - Template B for an annual compliance refresherThe Microlearning Problem Most Teams Miss
Shorter video isn't automatically microlearning
Many teams begin by cutting a long recording into smaller files. That may make the content easier to open, but it doesn't necessarily make it easier to learn. If the original video contains several objectives, lengthy explanations, and no meaningful practice, dividing it into parts just creates several small versions of the same problem.
Microlearning is a design discipline, not a file format. Each lesson needs a clear purpose and a manageable cognitive task. The learner should know why the lesson matters, what action to take, and how to tell whether they can perform it.
Research on pacing defines it as the rhythm and timing of classroom activities, including how time is allocated between components and when an instructor shifts from one activity to another. That principle applies to corporate video as well. Pacing determines whether learners have enough time to process information, try a behavior, and transition without overload. Research on pacing and sequencing also treats pacing as more than total lesson length, it's the controlled allocation of time across learning tasks.
Start with the learner's situation
A learner watching onboarding content during a first day at work needs a different rhythm from a manager completing a compliance refresher before approving a case. One may need a guided workflow. The other may need a short scenario and a decision check.
Before scripting, ask:
- What must the learner do afterward? Name the observable workplace behavior.
- What does the learner already know? Remove explanations they can safely retrieve or recognize.
- Where will the lesson be used? A phone between meetings calls for a different interaction pattern than a scheduled workshop.
- What happens next? A lesson in a sequence should prepare the learner for the next action, not attempt to contain the entire subject.
> Design principle: Every segment should earn its place by helping the learner perform the lesson objective.
The strongest microlearning libraries usually begin on paper. Designers decide the objective, ordering, practice point, and follow-up before anyone records narration or creates slides. That discipline prevents attractive visuals from carrying content that has no clear job.
Define One Clear Objective per Lesson
A strong lesson objective describes something the learner can do and demonstrate. It shouldn't describe a private mental state such as “understand,” “know,” or “be aware of.” Those verbs may express an intention, but they don't tell you what evidence to collect.
Consider a harassment-prevention refresher. “Understand respectful workplaces” covers too much territory and gives the production team no reliable stopping point. A more useful objective is: “Identify three behaviors that constitute retaliation and apply the correct reporting path for each.”
That sentence changes the design immediately. The lesson needs examples of retaliation, a way to distinguish retaliation from other workplace conflict, and practice applying the reporting route. A history of every workplace conduct policy may be relevant to the wider program, but it doesn't belong in this lesson unless it supports that action.
Build the objective in three passes
Start by naming the workplace task. What will the learner face in an email, conversation, system, or decision? Then select an observable verb, such as identify, classify, choose, demonstrate, complete, or respond. Finally, define the condition or standard that makes the performance useful.
Use this filter:
1. Task: What action must happen? 2. Context: In what situation will the learner perform it? 3. Evidence: What will show that the learner performed it correctly?
For the compliance example, a scenario might show a supervisor excluding an employee from a project after the employee raised a concern. The learner chooses whether the behavior could constitute retaliation and selects the reporting path. The interaction measures the objective directly, rather than asking whether the learner enjoyed the video or remembers a definition.
Teams building their first library can use this practical guide to write learning objectives before drafting scripts. It helps keep the objective separate from the topic, which is where many overloaded lessons begin.
Let the objective remove content
Put the objective at the top of the script. Next to every planned segment, write the exact part of the objective it supports. If you can't make that connection, cut the segment or move it to another lesson.
This is also where resources for ideas for educational content creators can help generate formats and examples, but ideas should remain subordinate to the learning task. A clever hook, animated definition, or expert interview isn't automatically useful. It belongs only when it helps the learner perform the stated behavior.
> One objective means one lesson. If the learner must identify, explain, and complete a process, those may be related objectives, but they still deserve separate design decisions.
Choose an Ordering Pattern That Fits the Goal
The opening sequence determines whether learners understand the relevance of a lesson before they decide to leave it. Corporate L&D teams commonly use three patterns: problem-first, workflow-first, and concept-first. None is universally superior. The right choice depends on the learner's context, prior knowledge, and risk of making the wrong decision.
| Pattern | Best For | Risk if Misused | |---|---|---| | Problem-first | High-stakes behavior, skeptical audiences, unfamiliar risks | The example can feel alarming or confusing without enough context | | Workflow-first | Onboarding, system procedures, repeatable job tasks | Learners may follow steps without understanding when or why to use them | | Concept-first | New vocabulary, complex mental models, foundational knowledge | The lesson may feel abstract before the learner sees a practical payoff |
Problem-first
Open with the costly mistake the lesson prevents. A compliance lesson might show an employee reporting a concern to the wrong channel and explain why the response creates additional risk. This pattern works when learners don't yet feel the urgency or when the behavior protects people, customers, or the organization from a consequential error.
Keep the opening concrete. The learner shouldn't need to absorb a policy definition before understanding the problem. Show the decision, pause before the outcome, and let the lesson explain the principle that governs it.
Workflow-first
Use the actual order of work. For new software onboarding, show the learner how to locate the request, enter the required information, submit it, and confirm the status. The sequence should match the screen, handoff, and decision points the employee will encounter later.
This pattern reduces translation. Learners don't have to convert a general explanation into a procedure because the lesson already mirrors the task. Add a short reason at each critical step so the learner understands which steps are mandatory and which are merely convenient.
Concept-first
Start with the mental model when learners lack the language to recognize the situation. A sales enablement lesson about objection handling may need to distinguish a product concern from a budget concern before asking the representative to choose a response.
The concept should remain compact and quickly connect to an example. A useful rule is to select the pattern that gets the learner to a confident first action fastest. If the learner needs urgency, lead with the problem. If the learner needs execution, lead with the workflow. If the learner needs recognition, establish the concept first.
Set Segment Length by Cognitive Load
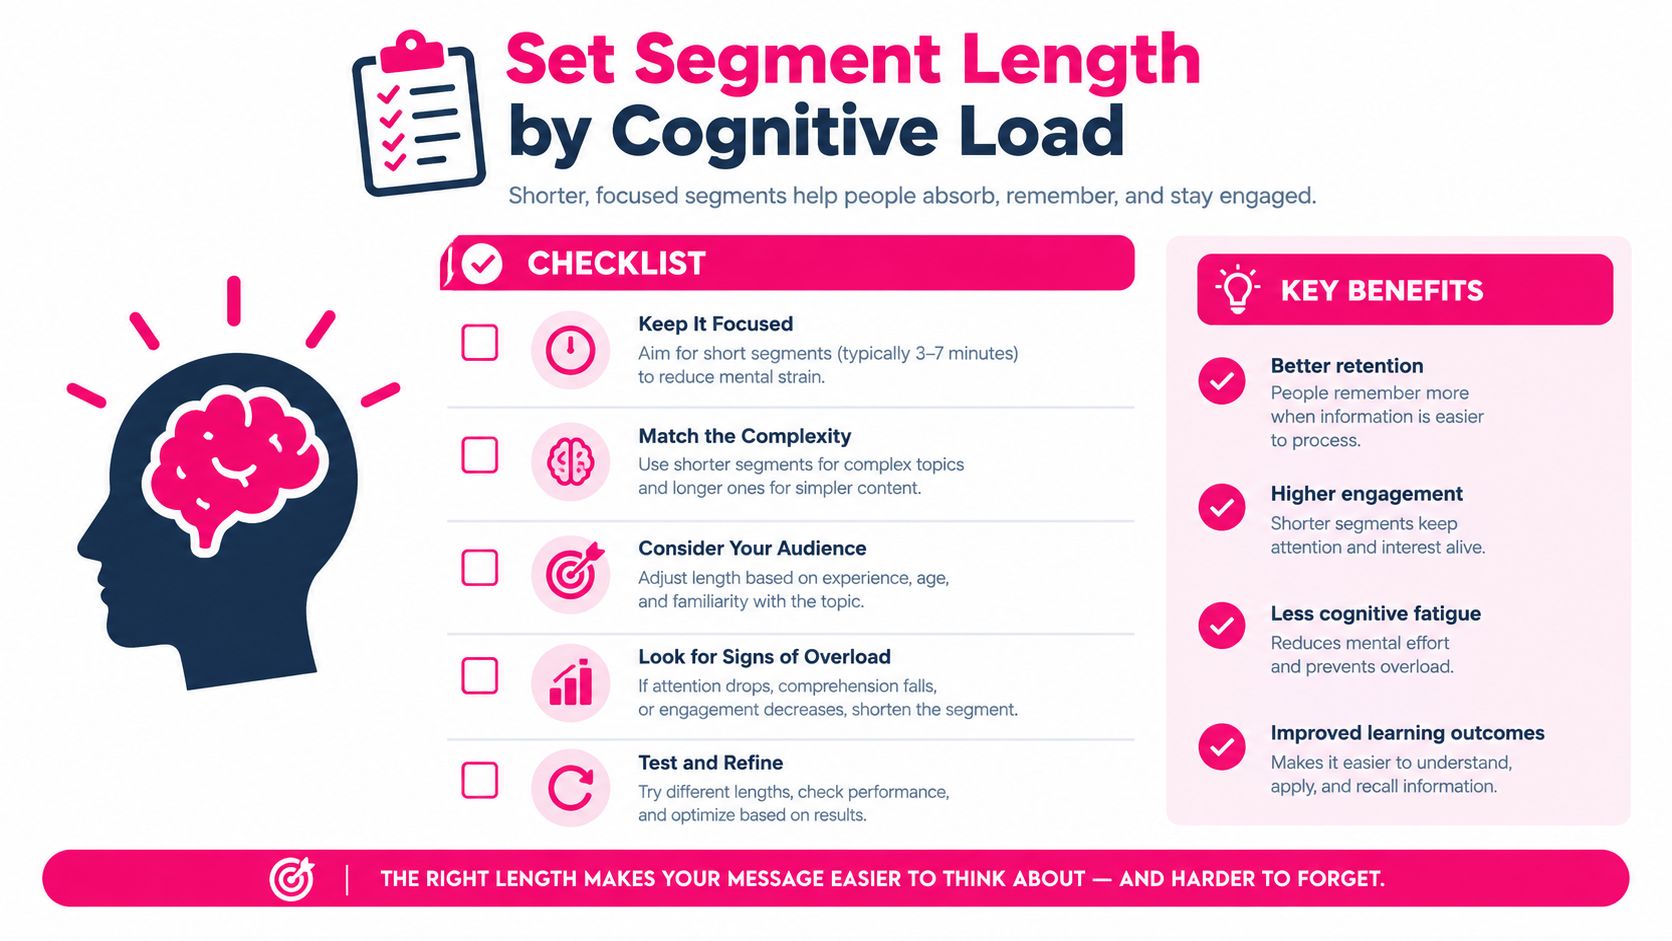
A five-minute segment can overload a learner if it combines dense terminology, competing visuals, and a difficult decision. A longer segment can work when it follows one coherent explanation and uses familiar examples. Cognitive load, not a stopwatch, should determine where the segment ends.
A 2026 peer-reviewed meta-analysis found that the strongest microlearning design used 5 to 10 minute sessions delivered 3 to 5 times per week, with a pooled odds ratio of 1.87 for retention. It reported a standardized mean difference of 0.74 for learning outcomes overall. Sessions shorter than 5 minutes were less effective, with an SMD of 0.51, while sessions longer than 15 minutes showed no advantage over traditional instruction, with an SMD of 0.28. The meta-analysis supports repeated, short learning experiences, not a fixed duration for every topic.
Estimate the work inside the segment
Examine three kinds of load before setting the runtime:
- Intrinsic load: How complex is the subject? A policy with several exceptions carries more conceptual density than a single definition.
- Extraneous load: How much effort does the presentation require? Busy slides, unnecessary transitions, and unfamiliar interface elements consume attention without improving understanding.
- Germane load: What mental work helps learners build a useful structure? A classification prompt or short scenario makes them process the idea rather than only hear it.
A recent synthesis recommends roughly 8 to 12 minute sessions with interaction every 2 to 3 minutes, while emphasizing that spacing and retrieval matter more than duration alone. The neutral evidence review separates a short format from an effective one. The two reviews bracket the same practical window: keep sessions under roughly 12 minutes, then let the density of the learner's decision determine where the segment falls within that window. A low-complexity explanation may need less time. A branching procedure may need the upper end, provided the learner gets opportunities to respond.
Use a production heuristic
Build each segment around:
1. One idea 2. One relevant example 3. One check or response
Add a brief pause after the explanation. Ask the learner to retrieve, classify, choose, or attempt something. If the script introduces a third new term before the learner has used the first two, split the segment.
Before recording, ask: Can a learner explain this segment's point without rewatching it? If not, reduce concept density, remove slide noise, or move one idea into a later lesson. For a fuller breakdown of duration trade-offs, see our guide to how long a microlearning video should be. The right length is the shortest duration that gives the learner enough context to perform the intended task.
Pace Within and Across Lessons
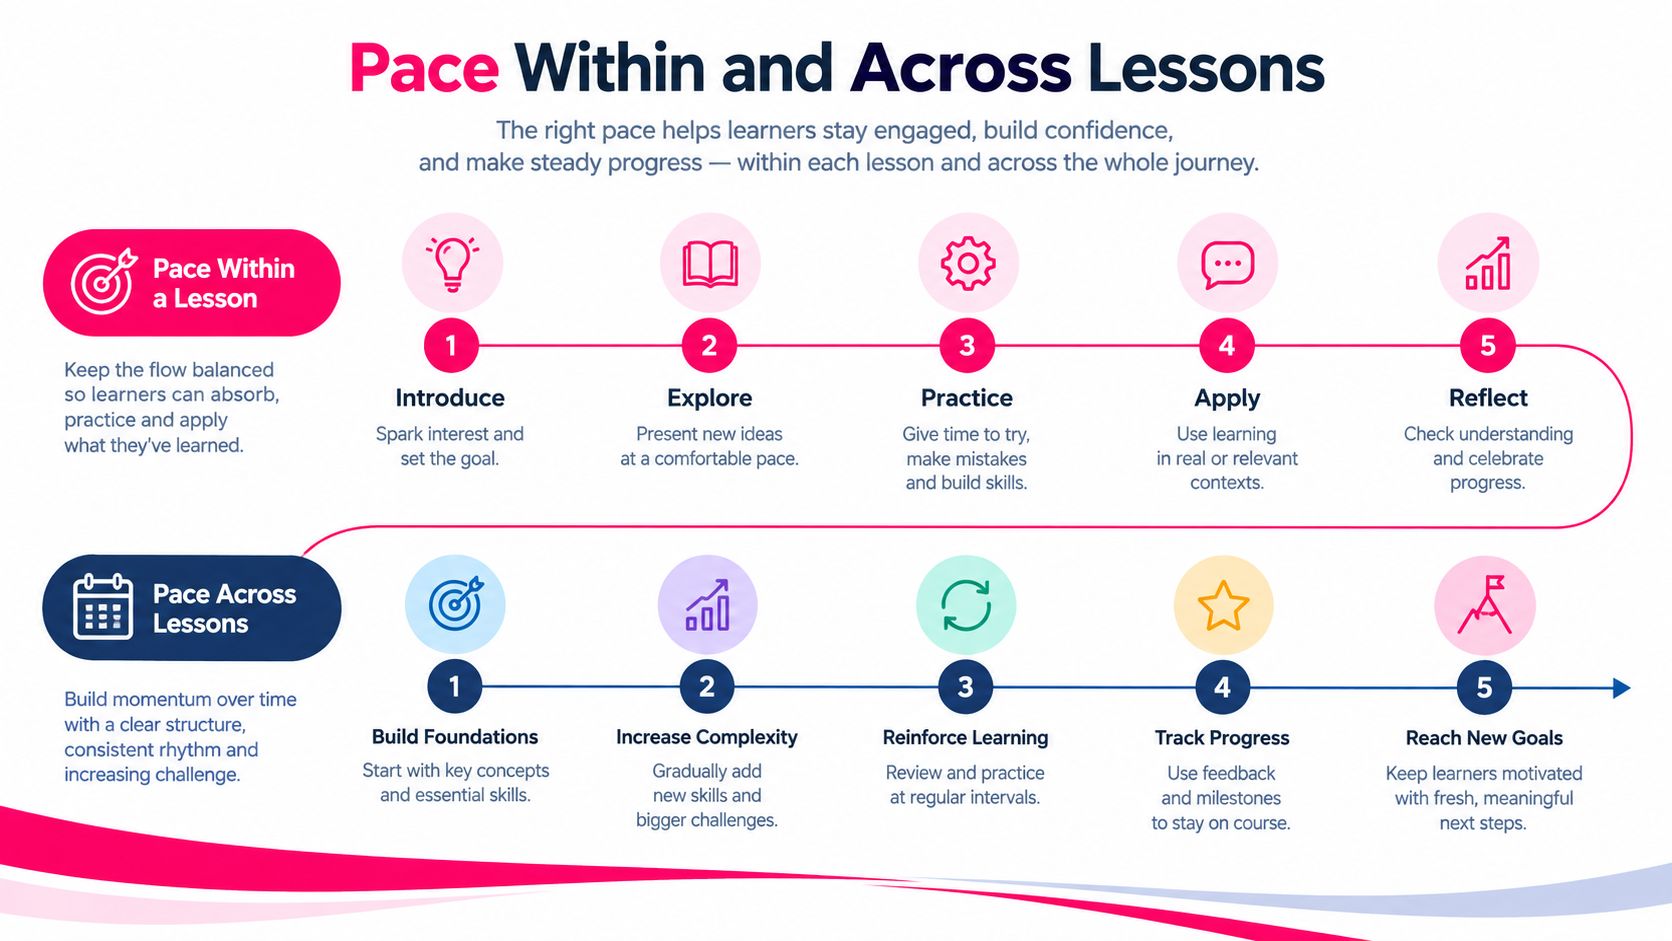
Pacing operates on two levels. Within a lesson, you control the alternation between input and action. Across a series, you control when the learner encounters, retrieves, and applies related ideas.
Inside a video, alternate a short explanation with an active response. A learner might watch a process demonstration, answer a question card, inspect a click-to-reveal example, and then pause to try the next step. The response doesn't need to be elaborate. It needs to make the learner do something with the information before more information arrives.
Mark these beats in the script:
- Input: State or demonstrate the idea.
- Pause: Leave intentional silence so the learner can process it.
- Action: Ask for a choice, recall, prediction, or attempt.
- Feedback: Explain why the response works or fails.
- Next beat: Add only the information needed for the following decision.
Record the pause as part of the production plan. If an editor sees only narration, they may remove the silence to make the video feel faster. That creates a polished recording with no room for thinking.
A 2026 study of university STEM courses found that Guided Pomodoro, brief instructor-led micro-activities embedded in lecture flow, outperformed both uninterrupted instruction and unstructured announced breaks across five consecutive cohorts. The study of structured pacing points to an important distinction: a pause works best when it has a learning job. Random interruption can damage flow, while a guided activity can redirect attention toward retrieval or application.
Across a sequence, space related lessons instead of placing every explanation in one sitting. Begin each new lesson with a short recall prompt from the previous one, then revisit the behavior later through a fresh scenario. For example, a sales enablement series can introduce a product, address an objection in a later lesson, and practice a follow-up conversation after that. A compliance program can recycle one decision question in recurring refreshers rather than relying on a single annual viewing.
Use checks for understanding to make these retrieval moments visible in the storyboard and measurable in the LMS.
Two Ready-to-Use Lesson Templates
Templates reduce production friction, but they shouldn't replace judgment. Keep the sequence stable while changing the scenario, interaction, and degree of explanation for the learner's context. If your team also needs to coordinate sessions, instructors, or follow-up activities, a tool for lesson booking software may sit alongside the video workflow, but the lesson still needs its own objective and response points.
Template A for day-one onboarding
Use this structure when a new employee needs to complete one workflow confidently.
- 0:00, hook scenario: Show the new hire facing the task for the first time. Use a realistic screen or workplace moment. Production note: start with action, not a title card.
- 0:45, objective: State the single behavior the learner will perform. Production note: display the objective in plain on-screen text.
- 1:30, guided tour: Demonstrate one workflow from start to finish. Production note: zoom only to the control the learner must use.
- 4:00, try-it prompt: Ask the learner to predict or complete the next step. Production note: record 2 seconds of silence before feedback.
- 5:00, recap and preview: Summarize the action and identify the next lesson. Production note: show the workflow as a compact visual sequence.
Template B for an annual compliance refresher
Use this structure when the learner must apply a policy to a realistic decision.
- 0:00, policy-change hook: Show the workplace situation affected by the change. Production note: name the consequence without reading the whole policy.
- 0:30, target behavior: State one action the learner must apply. Production note: use an action verb and keep the statement visible.
- 1:00, micro-case: Present a case with two decision points. Production note: stop narration before each choice.
- 3:00, branch feedback: Explain the correct action and why the alternative fails. Production note: use separate feedback cards for each choice.
- 3:45, knowledge check and signoff: Ask one final application question and record completion. Production note: make the check assess the behavior, not recall of a policy title.
| Phase | Onboarding Template (6 min) | Compliance Refresher (4 min) | |---|---|---| | Opening | Workplace workflow hook | Policy-change scenario | | Core instruction | Guided tour of one process | One behavior and a micro-case | | Practice | Try the next step | Two decision points with feedback | | Close | Recap and next lesson | Knowledge check and signoff |
Duplicate these structures in your authoring tool, then swap the content while preserving the role of each phase. The time budgets are starting points, not laws. If the onboarding workflow has higher complexity, add a separate lesson rather than stuffing more explanation into the same recording.
Putting It All Together
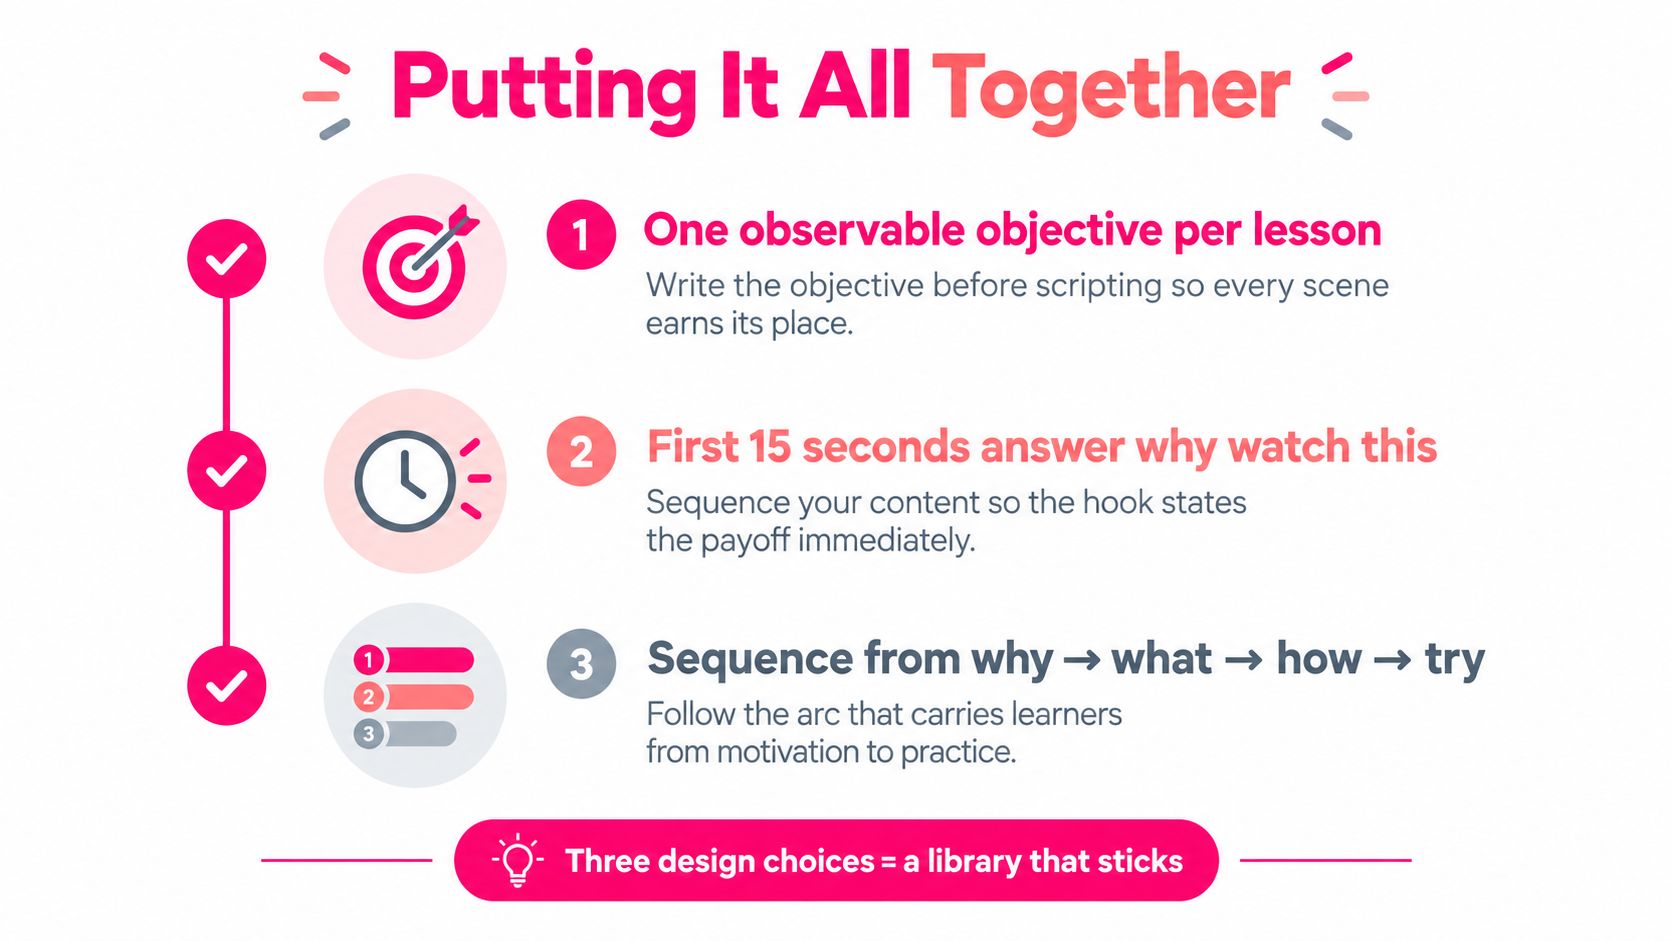
A durable microlearning library depends on three choices made before production:
1. Write one observable objective. The objective determines what belongs, what gets cut, and what the learner must demonstrate. 2. Sequence for immediate relevance. The opening should answer why the lesson matters, then move toward the first useful action. 3. Size each segment for its cognitive work. Don't force a dense diagnostic and a simple policy reminder into the same duration.
Before recording, pressure-test every storyboard. Can the team point to the objective? Is the ordering pattern deliberate? Does every segment have a reason for its length? Where will the learner respond? What lesson or retrieval prompt follows this one?
Common failures are easy to recognize. A lesson carries several objectives because the subject-matter expert wants to “cover everything.” A team applies the same segment duration to onboarding, troubleshooting, and policy interpretation. An editor adds faster cuts and animations after the fact, treating pacing as visual polish instead of a structural decision.
Build rough cuts with on-screen labels for each beat, then pilot a small selection with representative learners. Review completion and one retrieval question rather than relying only on view counts. When teams evaluate whether learners can perform the target behavior later, they can improve the library's instructional design instead of merely optimizing its appearance.
For teams comparing enablement outcomes with sales activity, resources on metrics for demo success can provide a useful measurement perspective. The same discipline applies to training: define the intended action first, then choose evidence that shows whether learners can take it.
VideoLearningAI can help educators, course creators, and corporate trainers turn existing materials into structured, bite-sized training videos, with support for scripts, templates, publishing, and LMS-oriented workflows. Visit VideoLearningAI to turn your next objective into a paced lesson, test it with learners, and build the rest of your library from a structure that holds attention.